II.Editing for Beginners
Part 4 - Splitting and Submixes - Part 4
Moving bits of an Audiotrack
In all projects you'll be pushing your audio around at some point. Otherwise, what are you doing here ?
There are techniques, easily achievable with Audacity, to cover almost any kind shifting you'd want to do. In our example, we have a small sentence of speech, where the speaker made a pause after the first word. We'd like to eliminate that pause.
The part after the pause is selected
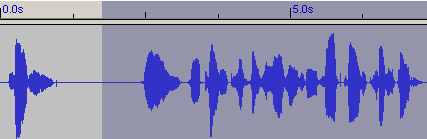
Select
Then the split function is used to pop the selected audio to a new track
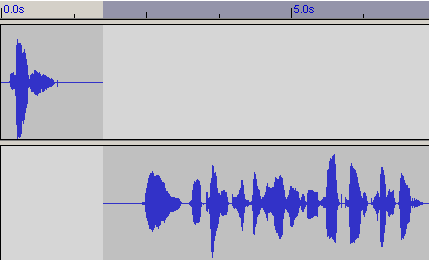
Split
The Time Shift Tool  is selected and the audio on the lower track is moved left.
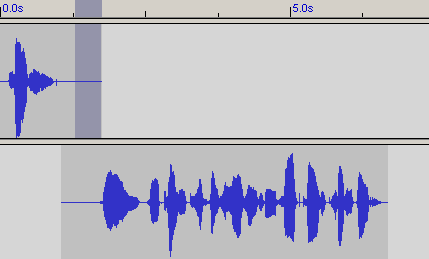
Move Audio and select for fading
|
Now, it's a good idea to listen to the two tracks individualy for breathing sounds for example.
Use the solo button of the tracks for this. Then listen them both in the mix. Again, you can use the solo buttons for this.
If you have a lot of other tracks playing at the same time, press the solo buttons on both tracks. There should be no over lapping or cut-off breathing sounds.
When you're satisfied, fade out the last two thirds of the overlapping upper part of the track, and fade in the first two thirds of the lower overlapping audio.
|
Two thirds, and not the whole overlapping audio, are chosen to keep the level of audio constant. If the whole overlapping parts were faded, you would get a level drop of 3dB in the middle of those fades.
You can check this out by taking a piece of music, duplicating it, and then fading the tracks, one fading out, the second fading in. In the middle of those fades, the level of the mix will drop audibly. Do a fade over last two thirds for the fade out and first two thirds for the fade in, and you probably won't notice any change in level.
Two thirds is a guideline, but not the law, so you may have to experiment a little.
|
Mixing it back together again
!!!Remember!!!
The final mix is done with the Export as WAV function in the
File Menu. Here we'll be looking at creating submixes with the Quickmix function.
You've done a lot of edits and now have dozens of little tracks with little bits and pieces here and there. It might look like this:

Bits and Pieces spread all over the screen
First four tracks selected for quickmixing
We can use the Quickmix function in the Project menu
to bring down the number of tracks. However, you don't need to mix everything in to one new track.
Select the tracks you want to mix together by SHIFT+click 'ing on the track panels.
In the graphics above, the first four tracks are selected.
Then select Quickmix. In this example I have quickmixed everything down to two tracks :
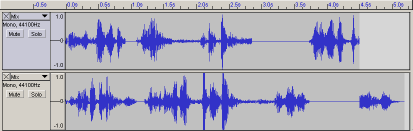
Bits and Pieces, quickmixed down to two tracks
And thus, two submixes were created. Remember though, that
we did this for convenience of not having to organize a large number or tracks.
If you still want to shift bits around later on, you should make sure that the parts being mixed
to a track do not overlap, so you can split it away and edit it again later.