3. What Every Linux User Knows
This chapter concerns those concepts and commands that every Linux user
knows--how to start and stop the system, log in and out from it, change
your password, see what is happening on the system, and use the system
help facilities. Mastery of these basic concepts is essential for using
Linux with any degree of success.
Some of these recipes make reference to files and directories; these
concepts are explained in Files and Directories.
3.1 Controlling Power to the System
These recipes show how to start and stop power to the system--how to
turn it on and turn it off. It's more than just pressing the button on
the case; in particular, there is a right way to turn off the system,
and doing it wrong can result in losing some of your work. Fortunately,
there isn't any black magic involved, as we soon shall see--properly
shutting down the system is easy!
3.1.1 Powering Up the System
The first thing you do to begin using the system is start power to it.
To power up the system, just turn it on. This is called booting
the system.
As the Linux kernel boots there will be many messages on the
screen. After a while, the system will display a login:
prompt. You can now log in. See section Logging In to the System.
Some systems are configured to start xdm at boot time
(see section Starting X). If your system is configured like
this, instead of the login: prompt described above, you'll see a
graphical screen with a box in the middle containing both login:
and Password: prompts. Type CTRL-ALT-F1 to
switch to the first virtual console, where you can log in to the system
in the usual way (see section Console Basics).
3.1.2 Turning Off the System
You can't just flip the power switch when you are done using the
computer, because Linux is constantly writing data to disk. (It also
keeps data in memory, even when it may have appeared to have written
that data to disk.) Simply turning off the power could result in the
loss or corruption of some of your work.
The following describes a method of turning off the system that can be
done by a normal user; the traditional way of shutting down can only be
performed by the superuser, and is described in Shutting Down the System.
To turn off a single user system, first log out of all consoles
(discussed in Console Basics). Then, type
CTRL-ALT-DEL (press and hold these three keys at
once).(10)
The system will print some messages as it shuts down, and when you see
the line, `Rebooting...', it's safe to turn the power to machine
off.
NOTE: You don't want to wait too long after you see this
message; if left untouched, the system will reboot and you'll be back to
the beginning!
3.2 Accounts and Privileges
Linux is a multi-user system, meaning that many users can use one Linux
system simultaneously, from different terminals. So to avoid confusion
(and to maintain a semblance of privacy), each user's workspace must be
kept separate from the others.
Even if a particular Linux system is a stand-alone personal computer
with no other terminals physically connected to it, it can be shared by
different people at different times, making the separation of user
workspace still a valid issue.
This separation is accomplished by giving each individual user an
account on the system. You need an account in order to use the
system; with an account you are issued an individual workspace to use,
and a unique username that identifies you to the system and to
other users. It is the name that the system (and those who use it) will
then forever know you as; it's a single word, in all lowercase letters.
During the installation process, the system administrator should have
created an account for you. (The system administrator has a special
account whose username is root; this account has total access to
the entire system, so it is often called the superuser.)
Until the mid-1990s it was widely common for usernames to be the first
letter of your first name followed by your entire surname, up to 12
characters total. So for example, user Samuel Clemens would have a
username of sclemens by this convention; this, however, is not a
hard and fast rule, especially on home systems where you may be the only
user. Sometimes, a middle initial may be used ("dkjohnson"), or
sometimes even nicknames or initials are used ("zenboy,"
"xibo"). But whatever username you pick for yourself, make sure
it's one you can live with, and one you can stand being called by both
the system and other users (your username also becomes part of your
email address, as we'll see in Email).
In addition to your username, you should also have a password that
you can keep secret so that only you can use your account. Good
passwords are strings of text that nobody else is likely to guess (i.e.,
not obvious words like `secret', or identifying names like
`Ruski', if that happens to be your pet cat). A good password is
one that is highly memorable to you so that you don't have to write it
down, but is complex enough in construction so that anyone else couldn't
ever guess it. For example, `t39sAH' might be a
fine password for someone whose first date was to see the movie The 39
Steps directed by Alfred Hitchcock.
NOTE: While usernames are always in lowercase, passwords are
case sensitive; the passwords `Secret', `secret', and
`SECRET' are all considered different.
3.2.1 Logging In to the System
To begin a session on a Linux system, you need to log in. Do this
by entering your username at the login: prompt on your terminal,
and then entering your password when asked.
The login: prompt appears on the terminal after the system
boots. If your system is configured to start the X Window System at boot
time, you'll be presented with an X login screen instead of the standard
login prompt. If that happens, press CTRL-ALT-F1 to
switch to the text login screen; this is explained further in
Console Basics.
A typical login: prompt looks like this:
| |
Debian GNU/Linux 2.2 bardo tty1

bardo login:
|
Every Linux system has its own name, called the system's hostname;
a Linux system is sometimes called a host, and it identifies
itself with its hostname at the login: prompt. It's important to
name your system--like a username for a user account, a hostname gives
name to the system you are using (and it becomes especially important
when putting the system on a network). The system administrator usually
names the system when it is being initially configured (the hostname can
always be changed later; its name is kept in the file
`/etc/hostname'). Like usernames, hostnames are one word in all
lowercase letters. People usually give their system a name they like,
such as darkstar or shiva.
In this example, `bardo' is the hostname of this particular Linux
system.
The name of the terminal you are connecting from is displayed just after
the hostname. In this example, the terminal is `tty1', which means
that this is the first terminal on this particular
system. (Incidentally, `tty' is short for "teletype," which
historically was the kind of terminal hardware that most Unix-based
systems used by default.)
To log in to the system, type your username (followed by RET) at
the login: prompt, and then type your password when asked (also
followed by RET); for security purposes, your password is not
displayed on the screen when you type it.
-
To log in to the system with a username of `kurt' and a password
of `empathy', type:
| |
Debian GNU/Linux 2.2 bardo tty1

bardo login: kurt RET
Password: empathy RET
Linux bardo 2.0.30 #1 Tue Jul 29 10:01:26 EDT 1997 i586 unknown

Copyright (C) 1993-1998 Software in the Public Interest, and others

Most of the programs included with the Debian Linux system are
freely redistributable; the exact distribution terms for each
program are described in the individual files in
/usr/doc/*/copyright

Debian GNU/Linux comes with ABSOLUTELY NO WARRANTY, to the extent
permitted by applicable law.
Last login: Tue Apr  5 12:03:47 on tty1.
No mail.
~ $
|
Once you've entered your username and password, you are "logged in" to
the system. You can then use the system and run commands.
As soon as you log in, the system displays the contents of
`/etc/motd', the "Message of the Day" file. The system then
displays the time and date of your last login, and reports whether or
not you have electronic mail waiting for you (see section Email). Finally, the system puts you in a shell---the environment
in which you interact with the system and give it commands. Use of the
default shell on most Linux systems, bash, is discussed
in The Shell.
The dollar sign (`$') displayed to the left of the cursor is called
the shell prompt; it means that the system is ready and waiting
for input. (You can change this prompt to any text of your liking; to
learn how, see section Changing the Shell Prompt.) By
default, the shell prompt includes the name of the current directory,
which it places to the left of the `$' character. The tilde
character (`~'), is a shell symbol that denotes the user's home
directory--when you log in, you are in your home directory (these terms
are defined in Files and Directories).
3.2.2 Logging Out of the System
To end your session on the system, type logout at the shell
prompt. This command logs you out of the system, and a new login:
prompt appears on your terminal.
-
To log out of the system, type:
| | $ logout RET
Debian GNU/Linux 2.2 bardo tty1
bardo login:
|
What works equally well to typing the logout command is to just
type C-d (hold down CTRL and press D). You don't even
have to type RET afterwards. Many users prefer this quick
shortcut.
Logging out of the system frees the terminal you were using--and
ensures that nobody can access your account from this terminal.
If you are the only person using your system and have just ended a
session by logging out, you might want to power down the system.
See section Turning Off the System, earlier in this chapter.
3.3 Console Basics
A Linux terminal is a place to put input and get output from the
system, and usually has at least a keyboard and monitor.
When you access a Linux system by the keyboard and monitor that are
directly connected to it, you are said to be using the console
terminal. (Linux systems can be accessed in other ways, such as through
a network or via another terminal connected to a serial line;
see section Communications).
Linux systems feature virtual consoles, which act as separate
console displays that can run separate login sessions, but are
accessed from the same physical console terminal. Linux systems are
configured to have seven virtual consoles by default. When you are at
the console terminal, you can switch between virtual consoles at any
time, and you can log in and use the system from several virtual
consoles at once.
The following recipes explain the basic things you will need to do with
virtual consoles.
3.3.1 Switching between Consoles
To switch to a different virtual console, press ALT-Fn,
where n is the number of the console to switch to.
-
To switch to the fourth virtual console, press ALT-F4.
This command switches to the fourth virtual console, denoted by
`tty4':
| |
Debian GNU/Linux 2.2 bardo tty4

bardo login:
|
You can also cycle through the different virtual consoles with the left
and right arrow keys. To switch to the next-lowest virtual console (or
wrap around to the highest virtual console, if you're at the first
virtual console), press ALT-@leftarrow. To switch to
the next-highest virtual console, press
ALT-@rightarrow.
[GNU INFO BUG: any <> in the preceding line should be the one of the cursor arrow keys.]
-
To switch from the fourth to the third virtual console, press:
| | ALT-@leftarrow
[GNU INFO BUG: any <> in the preceding line should be the one of the cursor arrow keys.]
|
This keystroke switches to the third virtual console, `tty3':
| |
Debian GNU/Linux 2.2 bardo tty3

bardo login:
|
The seventh virtual console is reserved for the X Window System. If X is
installed, this virtual terminal will never show a login: prompt,
but when you are using X, this is where your X session appears. If your
system is configured to start X immediately, this virtual console will
show an X login screen.
You can switch to a virtual console from the X Window System using
CTRL in conjunction with the usual ALT and function
keys. This is the only console manipulation keystroke that works in X.
-
To switch from X to the first virtual console, press:
3.3.2 Scrolling the Console Text
When you are logged in at a virtual console, new lines of text appear at
the bottom of the console screen, while older lines of text scroll off
the top of the screen.
-
To view this older text, press SHIFT-PgUp
to scroll back through it.
-
Once you have scrolled back, press SHIFT-PgDn to scroll
forward through the text toward the most recent text displayed on
the console.
The amount of text you can scroll back through depends on system memory.
NOTE: This technique is for scrolling through text displayed in
your shell session (see section The Shell). It does not work for
scrolling through text in a tool or application in the console--in
other words, you can't use this technique to scroll through text that is
displayed by a tool for perusing text files. To scroll through text in
an application, use its own facilities for scrolling, if it has any.
3.3.3 Keys for Console Manipulation
Some keystrokes for manipulating the console display, including those
for switching between virtual consoles, are described below. It's a good
idea to experiment with these commands until you are comfortable with
them, because knowing how to use virtual consoles is basic to using
Linux.
| KEYSTROKE |
DESCRIPTION
|
| ALT-Fn |
Switch to virtual console n, where n is a number from 1
to 7 (the default maximum).
|
| CTRL-ALT-Fn |
When in X, switch to virtual console n, where n is a
number from 1 to 6.
|
| ALT-@leftarrow |
Switch to the next-lowest virtual console. For example, typing this
while in virtual console 4 switches to virtual console 3. Pressing this
keystroke in the lowest console wraps around to the highest console.
[GNU INFO BUG: any <> in the preceding line should be the one of the cursor arrow keys.]
|
| ALT-@rightarrow |
Switch to the next-highest virtual console. For example, typing
this while in virtual console 4 switches to virtual console 5. Pressing
this keystroke in the highest console wraps around to the lowest
console.
[GNU INFO BUG: any <> in the preceding line should be the one of the cursor arrow keys.]
|
| SHIFT-PgUp |
Scroll back one screen to view previously displayed text.
|
| SHIFT-PgDn |
When viewing previously displayed text, scroll forward one screen.
|
3.4 Running a Command
A tool is a software program that performs a certain
function--usually a specialized, simple task. For example, the
hostname tool outputs the system's hostname, and the who
tool outputs a listing of the users who are currently logged in. An
application is the name given to larger, usually interactive,
programs for completing broader kinds of tasks--such as programs for
image editing or word processing.
A tool or application may take any number of options (sometimes
called "flags"), which specify a change in its default behavior. It
may also take arguments, which specify a file or some other text
to operate on. Arguments are usually specified after any options.
A command is the name of a tool or application along with the
options and arguments you want to use, if any. Since typing the name of
a tool itself is often sufficient to accomplish a desired task, tools
alone are often called commands.
Commands are case sensitive; the names of tools and applications
are usually in all lowercase letters.
To run (or "execute") a tool or application without giving any options
or arguments, type its name at a shell prompt followed by RET.
-
To run the
hostname tool, type:
The hostname of the system in the example is `bardo'.
Options always begin with a hyphen character, `-', which is usually
followed by one alphanumeric character. To include an option in a
command, follow the name of the tool or application with the option.
Always separate the tool name, each option, and each argument with a
space character.
Long-style options (sometimes called "GNU-style" options) begin
with two hyphen characters (`--') and are usually one English word.
For example, many tools have an option, `--version', to output the
version number of the tool. (Many tools also have a `--help'
option, which outputs a list of options the tool takes; see section Listing the Usage of a Tool.)
-
To output the version of the
hostname tool, type:
| | $ hostname --version RET
hostname 2.10
$
|
This command outputs the text `hostname 2.10', indicating that this
is version 2.10 of the hostname tool.
Sometimes, an option itself may may take an argument. For example,
hostname has an option for specifying a file name to use to read
the hostname from, `-F'; it takes as an argument the name of the
file that hostname should read from.
-
To run
hostname and specify that the file `host.info' is the
file to read from, type:
| | $ hostname -F host.info RET
|
3.5 Changing Your Password
To change your password, use the passwd tool. It prompts you for
your current password and a new password to replace it with. For
security purposes, neither the old nor the new password is echoed to the
screen as you type it. To make sure that you type the new password
correctly, passwd prompts you for your new password twice. You
must type it exactly the same way both times, or passwd will not
change your password.
-
To change your password, type:
| | $ passwd RET
Changing password for kurt
Old password: your current password RET
Enter the new password (minimum of 5, maximum of 8 characters)
Please use a combination of upper and lower case letters and numbers.
New password: your new password RET
Re-enter new password: your new password RET
Password changed.
$
|
NOTE: Passwords can contain uppercase and lowercase letters,
the digits 0 through 9, and punctuation marks; they should be between
five and eight characters long. See section Accounts and Privileges, for suggestions on choosing a good password.
3.6 Listing User Activity
The recipes in this section describe some of the simple commands for
finding out who you are currently sharing the system with and what they
are doing.
3.6.1 Listing Your Username
Use whoami to output the username of the user that is logged in
at your terminal. This is not as inutile a command as one might first
think--if you're at a shared terminal, it's useful to determine whether
or not it is your account that you're messing in, and for those with
multiple accounts on a system, it's useful to see which of them you're
currently logged in with.
-
To output your username, type:
In this example, the username of the user logged in at this terminal is
`kurt'.
3.6.2 Listing Who Is on the System
Use who to output a list of all the users currently logged in to
the system. It outputs a minimum of three columns, listing the username,
terminal location, and time of login for all users on the system. A
fourth column is displayed if a user is using the X Window System; it
lists the window location of the user's session (see section The X Window System).
-
To see who is currently logged in, type:
| | $ who RET
murky tty1 Oct 20 20:09
dave tty2 Oct 21 14:37
kurt tty3 Oct 21 15:04
kurt ttyp1 Oct 21 15:04 (:0.0)
$
|
The output in this example shows that the user murky is logged in
on tty1 (the first virtual console on the system), and has been
on since 20:09 on 20 October. The user dave is logged in on
tty2 (the second virtual console), and has been on since 14:37 on
21 October. The user kurt is logged in twice--on tty3
(the third virtual console), and ttyp1, which is an X session
with a window location of `(:0.0)'.
NOTE: This command is for listing the users on the local
system; to list the users connected to a different system on the
network, or to see more detailed information that a user may have made
public about himself, see Checking Whether a User Is Online.
3.6.3 Listing Who Is on and What They're Doing
The w tool is similar to who, but it displays more
detail. It outputs a header line that contains information about the
current system status, including the current time, the amount of time
the system has been up and running, and the number of users on the
system. It then outputs a list of users currently logged in to the
system, giving eight columns of information for each. These columns
include username, terminal location, X session (if any), the time of
login, the amount of time the user has been idle, and what command the
user is running. (It also gives two columns showing the amount of time
the system's CPU has spent on all of the user's current jobs ("JCPU")
and foreground process ("PCPU"); processes are discussed in
Listing System Activity, and jobs in Managing Jobs.)
-
To see who is currently logged in and what they are doing, type:
| | $ w RET
5:27pm up 17:53, 4 users, load average: 0.12, 0.06, 0.01
USER TTY FROM LOGIN IDLE JCPU PCPU WHAT
murky tty1 Oct 20 20:09 17:22m 0.32s 0.32s -bash
dave tty2 14:37 13.00s 2:35 0.07s less foo
kurt tty3 15:04 1:00m 0.41s 0.09s startx
kurt ttyp1 :0.0 15:04 0:00s 21.65s 20.96s emacs
$
|
In this example, the command's output shows that the current system time
is 5:27 p.m., the system has been up for 17 hours and 53 minutes, and
there are four users currently logged in: murky is logged in at
tty1, has been idle for 17 hours and 22 minutes, and is at a
bash shell prompt; dave is logged in at tty2, has
been idle for 13 seconds, and is using less to peruse a file
called `foo' (see section Perusing Text); and
kurt is logged in at two terminals---tty3 and
ttyp1, which is an X session. He ran the startx command on
tty3 to start his X session, and within his X session, he is
currently using Emacs.
3.6.4 Listing the Last Times a User Logged In
Use last to find out who has recently used the system, which
terminals they used, and when they logged in and out.
-
To output a list of recent system use, type:
To find out when a particular user last logged in to the system, give
his username as an argument.
-
To find out when user
kurt last logged in, type:
NOTE: The last tool gets its data from the system file
`/var/log/wtmp'; the last line of output tells how far this file
goes back. Sometimes, the output will go back for several weeks or more.
3.7 Listing System Activity
When you run a command, you are starting a process on the system,
which is a program that is currently executing. Every process is given a
unique number, called its process ID, or "PID."
Use ps to list processes on the system. Some of the information
it can display about a process includes process ID, name of command
being run, username running the command, and how long the process has
been running. By default, ps outputs 5 columns: process ID, the
name of the terminal from which the process was started, the current
status of the process (including `S' for sleeping, meaning
that it is on hold at the moment, `R' meaning that it is running,
and `Z' meaning that it is a zombie process, or a process
that has already died), the total amount of time the CPU has spent on
the process since the process started, and finally the name of the
command being run.
The following recipes describe popular usage of ps.
3.7.1 Listing Your Current Processes
Type ps with no arguments to list the processes you have running
in your current shell session.
-
To list the processes in your current shell session, type:
| | $ ps RET
PID TTY STAT TIME COMMAND
193 1 S 0:01 -bash
204 1 S 0:00 ps
$
|
In this example, ps shows that two processes are running: the
bash and ps commands.
3.7.2 Listing All of a User's Processes
To list all the processes of a specific user, use ps and give the
username to list as an argument to the `-u' option. While you can't
snoop on the actual activities of other users, you can list the commands
they are running at a given moment.
-
To list all the processes that user
hst has running on the
system, type:
NOTE: This command is useful for listing all of your own
processes, across all terminals and shell sessions; give your own
username as an argument.
3.7.3 Listing All Processes on the System
To list all processes by all users on the system, use the `aux'
options.
-
To list all of the processes and give their usernames, type:
NOTE: There could be a lot of output--even single-user Linux
systems typically have fifty or more processes running at one time--so
you may want to pipe the output of this command through less for
perusal (see section Perusing Text).
Additionally, use top to show a display of all processes on the
system, sorted by their demand on the system resources. The display is
continually updated with current process information; press Q to
stop the display and exit the program. This tool also displays the
information about system runtime and memory that can be output with the
uptime and free commands.
-
To display a continually updated display of the current system
processes, type:
3.7.4 Listing Processes by Name or Number
To list processes whose output contains a name or other text to match,
list all processes and pipe the output to grep. This is useful
for when you want to see which users are running a particular program or
command.
-
To list all the processes whose commands contain reference to an
`sbin' directory in them, type:
-
To list any processes whose process IDs contain a 13 in them, type:
To list the process (if any) which corresponds to a process ID, give
that PID as an argument to the `-p' option.
-
To list the process whose PID is 344, type:
3.8 Help Facilities
Linux systems come with a lot of help facilities, including complete
manuals in etext form. In fact, the foremost trouble with Linux
documentation isn't that there is not enough of it, but that you have to
sift through the mounds of it, trying to find the precise information
you're looking for!
I describe the help facilities in the following sections; their relative
usefulness for the particular kind of information you're looking for is
noted.
If you find that you need more help, don't panic--other options are
available. They're described in If You Need More Help.
3.8.1 Finding the Right Tool for the Job
When you know what a particular tool or application does, but you
can't remember it's name, use apropos. This tool takes a keyword
as an argument, and it outputs a list of installed software whose
one-line descriptions contain that keyword. This is also useful for
finding software on your system related to, say, "audio" or "sound"
or "sort" or some other such general concept.
-
To output a list of programs that pertain to consoles, type:
| | $ apropos consoles RET
console (4) - console terminal and virtual consoles
gpm (1) - a cut and paste utility and mouse server for
virtual consoles
$
|
NOTE: The apropos tool only finds exact matches, so a
search for the keyword `console' might not list the programs that a
search for the keyword `consoles' would yield, and vice versa.
Another way to find tools by keyword is to search the system manual
pages (see section Reading a Page from the System Manual). To do
this, use man and give the text to search for as an argument to
the `-k' option. This searches the short descriptions and manual
page names for the given text, and outputs a list of those tools that
match in the same format as the apropos tool.
-
To output a list of all tools whose pages in the system manual contain a
reference to consoles, type:
On Debian systems, yet another way to find installed software by keyword
is to use dpkg, the Debian package tool. Use the `-l' option
to list all of the installed packages, which are each output on a line
of their own with their package name and a brief description.
You can output a list of packages that match a keyword by piping the
output to grep. Use the `-i' option with grep to
match keywords regardless of case (grep is discussed in
Searching Text).
Additionally, you can directly peruse the file
`/var/lib/dpkg/available'; it lists all available packages and
gives a description of them.
-
To list all of the packages on the system, type:
-
To list all of the packages whose name or description contains the text
"edit," regardless of case, type:
| | $ dpkg -l | grep -i edit RET
|
-
To peruse descriptions of the packages that are available, type:
| | $ less /var/lib/dpkg/available RET
|
3.8.2 Listing a Description of a Program
Use whatis to list a one-line description of a program. Give the
name of the tool or application to list as an argument.
-
To get a description of the
who tool, type:
NOTE: The whatis tool gets its descriptions from the
manual page of a given program; manual pages are described later
in this section, in Reading a Page from the System Manual.
3.8.3 Listing the Usage of a Tool
Many tools have a long-style option, `--help', that outputs usage
information about the tool, including the options and arguments the tool
takes.
-
To list the possible options for
whoami, type:
| | $ whoami --help RET
Usage: whoami [OPTION]...
Print the user name associated with the current effective user id.
Same as id -un.
--help display this help and exit
--version output version information and exit
Report bugs to [email protected]
$
|
This command outputs some usage information about the whoami
tool, including a short description and a list of possible options.
NOTE: Not all tools take the `--help' option; some tools
take a `-h' or `-?' option instead, which performs the same
function.
3.8.4 Reading a Page from the System Manual
In the olden days, the hardcopy reference manual that came with most
Unix systems also existed electronically on the system itself; each
software program that came with the system had its own manual page
(often called a "man page") that described it. This is still true on
Linux-based systems today, except they don't always come with a hardcopy
manual.
Use the man tool to view a page in the system manual. As an
argument to man, give the name of the program whose manual page
you want to view (so to view the manual page for man, you would
type man man).
-
To view the manual page for
w, type:
This command displays the manual page for w:
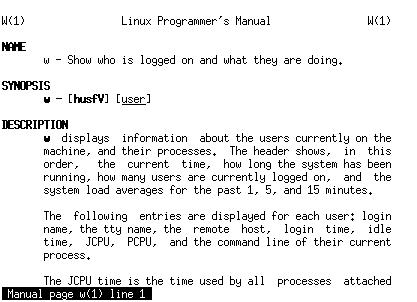
Use the up and down arrow keys to move through the text. Press Q
to stop viewing the manual page and exit man. Since man
uses less to display the text, you can use any of the less
keyboard commands to peruse the manual page (see section Perusing Text).
Despite its name, a manual page does not always contain the complete
documentation to a program, but it's more like a quick reference. It
usually gives a short description of the program, and lists the options
and arguments it takes; some manual pages also include an example or a
list of related commands. (Sometimes, commands have very complete,
extensive manual pages, but more often, their complete documentation is
found either in other help files that come with it or in its Info
documentation; these are subjects of the following two recipes.)
To prepare a man page for printing, see Preparing a Man Page for Printing.
3.8.5 Using the GNU Info System
The GNU Info System is an online hypertext reference system for
documentation prepared in the Info format. This documentation tends to
be more complete than a typical man page, and often, the Info
documentation for a given software package will be an entire book or
manual. All of the manuals published by the Free Software Foundation are
released in Info format; these manuals contain the same text
(sans illustrations) as the paper manuals that you can purchase
directly from the Free Software Foundation.
There are different ways to peruse the Info documentation: you can use
the standalone info tool, read Info files in the Emacs editor
(see section Emacs), or use one of the other tools designed for
this purpose. Additionally, tools exist for converting Info
documentation to HTML that you can read in a Web browser
(see section Browsing Files).
To read the Info manual for a tool or application with the info
tool, give its name as an argument. With no arguments, info opens
your system's Top Info menu, which lists all of the available
manuals that are installed on the system.
-
To view all of the Info manuals on the system, type:
This command starts info at the system's Top menu, which
shows some of the info key commands and displays a list of
available manuals:

Use the arrow keys to move through each "page" of information, called
an Info node. Nodes are the base unit of information in Info, and
are arranged hierarchically--a manual's Top node will contain an
Info menu containing links to its various chapters, and a chapter
node will contain a menu with links for its sections, and so on. Links
also appear as cross references in the text.
Links look the same in both menu items and cross references: an asterisk
(`*'), the name of the node it links to, and either one or two
colon characters (`:'). To follow a link to the node it points to,
move the cursor over any part of the node name in the link and press
RET.
To run a tutorial that describes how to use info, press the
H key. Press Q at any time to stop reading the documentation
and exit info.
To read Info documentation for a tool or application, give its name as
an argument to info; if no Info manual exists for that tool,
info displays the man page for that tool instead.
-
To read the Info documentation for the
tar tool, type:
This command opens a copy of The GNU tar Manual in info.
To read the contents of a file written in Info format, give the name of
the file to read with the `-f' option. This is useful for reading
an Info file that you have obtained elsewhere, and is not in the
`/usr/info' directory with the rest of the installed Info
files. Info can automatically recognize and expand Info files that are
compressed and have a `.gz' file name extension (see section Compressed Files).
-
To read `faq.info', an Info file in the current directory, type:
This command starts info and opens the Info file `faq.info',
beginning at the top node in the file.
To read a specific node in an Info file, give the name of the
node to use in quotes as an argument to the `-n' option.
-
To read `faq.info', an Info file in the current directory,
beginning with the node
Text, type:
| | $ info -n 'Text' -f faq.info RET
|
NOTE: You can also read Info documentation directly from the
Emacs editor; you type C-h i from Emacs to start the Info reader,
and then use the same commands as in the standalone info tool
(see section Getting Acquainted with Emacs).
The Emacs "incremental" search command, C-s, also works in
info; it's a very fast, efficient way to search for a word or
phrase in an entire Info text (like this entire book); see Searching Incrementally in Emacs.
3.8.6 Reading System Documentation and Help Files
@sf{Debian}: `doc-linux-text'
@sf{WWW}: http://linuxdoc.org/
The
`/usr/doc' directory is for miscellaneous documentation:
HOWTOs, FAQs, Debian-specific documentation files and documentation
files that come with commands. (To learn more about files and
directories, see
Files and Directories.)
To peruse any of these files, use
less, described in full in
Perusing Text.
When a software package is installed, any additional documentation files
it might have beyond a manual page and Info manual are placed here, in a
subdirectory with the name of that package. For example, additional
documentation for the hostname package is in
`/usr/doc/hostname', and documentation for the passwd
package is in `/usr/doc/passwd'. Most packages have a file called
`README', which usually contains relevant information. Often this
file is compressed as `README.gz', in which case you can use
zless instead of less.
The Linux Documentation Project (LDP) has overseen the creation of
more than 100 "HOWTO" files, each of which covers a particular aspect
of the installation or use of Linux-based systems.
The LDP HOWTOs are compressed text files stored in the
`/usr/doc/HOWTO' directory; to view them, use zless. The
file `/usr/doc/HOWTO/HOWTO-Index.gz' contains an annotated index of
all the HOWTO documents installed on the system.(11)
Finally, the `/usr/doc/FAQ' directory contains a number of FAQ
("Frequently Asked Questions") files on various subjects, and the
files that make up the Debian FAQ are in the `/usr/doc/debian/FAQ'
directory. The Debian FAQ is available both in HTML format, which you
can view in a Web browser (see section Browsing Files),
and as a compressed text file, which you can view in zless.
-
To view the HTML version of the Debian FAQ in the
lynx Web
browser, type:
| | $ lynx /usr/doc/debian/FAQ/debian-faq.html RET
|
-
To view the compressed text version of the Debian FAQ in
zless,
type:
| | $ zless /usr/doc/debian/FAQ/debian-faq.txt.gz RET
|
NOTE: It's often very useful to use a Web browser to browse
through the documentation files in these directories--see Browsing Files.
On some systems, `/usr/doc' is superseded by the
`/usr/share/doc' directory.
This document was generated
using texi2html